|
Introduction to PHP and MySQL
What is PHP? PHP is a widely-used general-purpose server-side scripting language that can be embedded into HTML. You can think of it as a "plug-in" for your Web server that will allow it to do more than just send plain Web pages when browsers request them. With PHP installed, your Web server will be able to read a new kind of file (called a PHP script) that can do things like retrieve up-to-the-minute information from a database and insert it into a Web page before sending it to the browser that requested it. PHP is completely free to download and use. If you are new to PHP and want to get some idea of how it works, try the introductory tutorial.
What is MySQL? MySQL is a relational database management system, or RDBMS. It has become the world's most popular open source database because of its consistent fast performance, high reliability and ease of use. PHP has MySQL extension which makes it really easy to access data in MySQL. MySQL Home Page
Useful MySQL Database Administration Tools phpMyAdmin (freeware)
Installing PHP and MySQL on Windows Both PHP and MySQL support various platforms, including Windows. It is recommended that you install MySQL and PHP on your computer so you can easily develop and test your PHP locally before uploading to your production server. You can install PHP on your Windows system using the Windows PHP installer which installs the CGI version of PHP for IIS, it configures the web server as well. However, while the Windows installer is an easy way to make PHP work, it does not include any extra external PHP extensions (e.g. php_mysql.dll) as you'll only find those in the Windows Zip Package. Note that PHP 5 is required (PHP 4 is not supported) and in PHP 5, MySQL is not enabled by default, so the php_mysql.dll (or php_mysqli.dll) DLL must be enabled inside of php.ini. Also, PHP needs access to the MySQL client library. A file named libmysql.dll is included in the Windows PHP distribution and in order for PHP to talk to MySQL this file needs to be available to the Windows systems PATH. See the FAQ titled "How do I add my PHP directory to the PATH on Windows" for information on how to do this. Although copying libmysql.dll to the Windows system directory also works (because the system directory is by default in the system's PATH), it's not recommended.As with enabling any PHP extension (such as php_mysql.dll), the PHP directive extension_dir should be set to the directory where the PHP extensions are located. An example extension_dir value for PHP 5 is C:\PHP\ext
In addition to PHP itself, you will need a Web server such as Internet Information Services (IIS) or Apache. PHP was designed to run as a plug-in for existing Web server software. If you have Windows 2000 or later, then install IIS (if it's not already on your system, see below section). If you do not have IIS at your disposal, you can instead use a free 3rd party Web server like Apache. If you have difficulties installing PHP and MySQL, you might as well try EasyPHP which is an "out of the box" Apache, MySQL, and PHP installation for Windows. However, EasyPHP might not includes the latest versions of PHP and MySQL, but they are already good enough for development. The next step is to set up a valid configuration file for PHP, php.ini. PHP searches for php.ini in the locations described in The configuration file.
Some Important Settings in php.ini for Using PHP on Windows session.save_path This is the path where session data files are stored. Make sure this setting points to an existing folder on your machine. For example, session.save_path = C:\PHP\sessiondata
upload_tmp_dir If you want to use file upload, make sure this setting points to an existing folder on your machine. For example, upload_tmp_dir = C:\PHP\uploadtemp
Internet Information Services (IIS) Internet Information Services (IIS) – formerly called Internet Information Server – is a web server application and set of feature extension modules created by Microsoft for use with Microsoft Windows. It is an integral part of Windows Server family of products, as well as certain editions of Windows XP, Windows Vista and Windows 7. IIS is not turned on by default when Windows is installed. Versions:
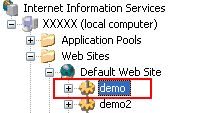
After installation, the default web directory to place the web site is in 'C:\Inetpub\wwwroot', but you can always set up your own virtual directory through the IIS Manager. For more information, see Creating Virtual Directories in IIS below.
Local IIS Web Sites A local Internet Information Services (IIS) Web site is an IIS Web application on your computer. Creating or opening a local IIS Web site is useful in the following situations:
Requirements
To open an existing local IIS Web site, the preceding must be true as well as the following:
Running Local IIS Web Sites Deploying Local IIS Web Sites
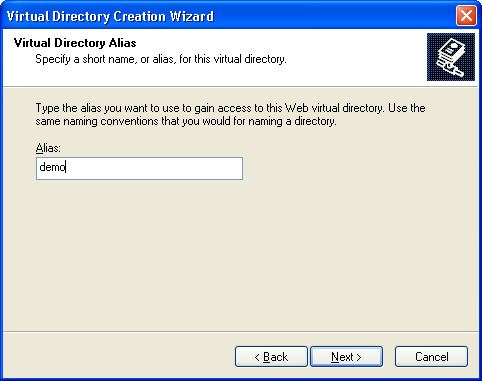
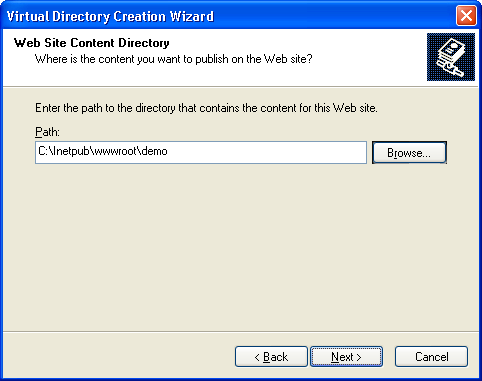
Creating Virtual Directories in IIS In most cases, the content you publish to your website is located in a root or home directory on your computer, such as C:\Inetpub\wwwroot\. However, there might be instances when the content is located somewhere else, or even on a remote computer. To publish from any directory not contained within your home or root directory, you can create a virtual directory. A virtual directory is a directory that is not contained in the home directory but appears to client browsers as though it were. You can create a virtual directory through IIS Manager or by using Windows Explorer.
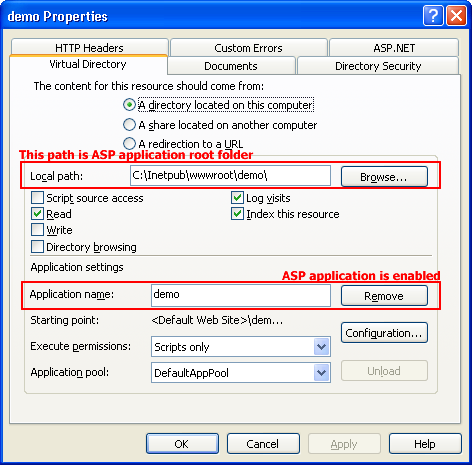
To create a virtual directory by using IIS Manager
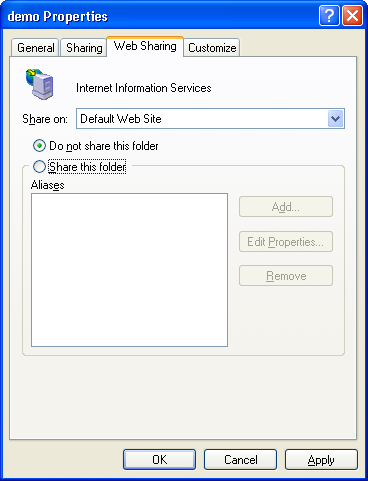
To create a virtual directory by using Windows Explorer
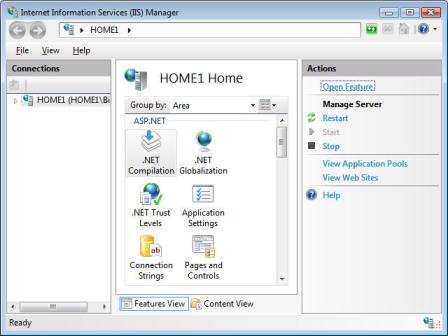
Creating Virtual Directories in IIS 7 (Windows Vista or Later) The IIS manager user interface consists of three panes.
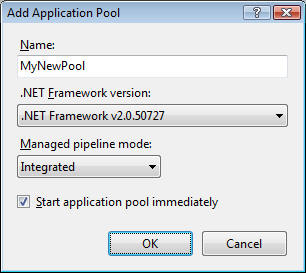
The left hand side pane is Connections, the middle pane is Workspace and the right hand side pane is Actions. The Connections pane lists application pools and websites. The workspace pane consists of two tabs at the bottom namely Features View and Content View. The Features View allows you to work with the settings of the selected item from Connections pane whereas the Content View displays all the child nodes (content) of the selected item. Application pool is a group of IIS applications that are isolated from other application pools. Each application pool runs in its own worker process. Any problem with that process affects the applications residing in it and not the rest of the applications. You can configure application pools individually. In order to create a new application pool, select "Application Pools" under Connections pane. Then click on "Add application pool" from Actions pane. This will open a dialog as shown below:
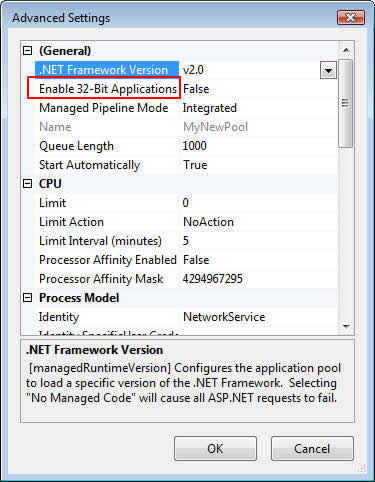
Specify a name for the new pool to be created. Select .NET framework version that all the applications from the pool will use. Also select pipeline mode. There are two pipeline modes viz. integrated and classic. The integrated mode uses the integrated request processing model whereas the classic mode uses the older request processing model. Click OK to create the application pool. Your new application pool will now be displayed in the Workspace pane. To configure the application pool click on the "Advanced Settings" option under Actions pane. The following figure shows many of the configurable properties of an application pool.
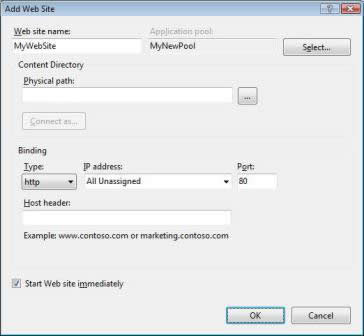
If you use 64-bit Windows, set Enable 32-Bit Applications to True. (See Running on 64-bit Windows Operating System below.) To create a new web site, select Web Sites node under Connections pane and then click on "Add Web Site" under Actions pane. This opens a dialog as shown below:
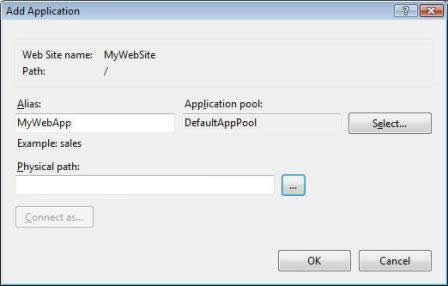
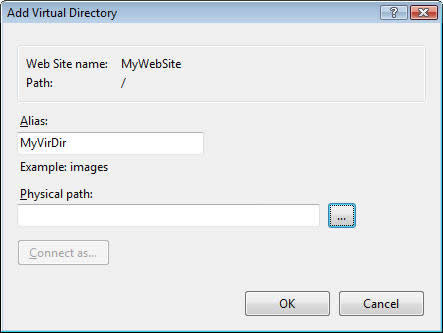
Here, you can specify properties of the new web site including its application pool and physical location. Creating an IIS application or a Virtual Directory is quick and simple. Just right click on the web site and choose either "Add Application" or "Add Virtual Directory" to open respective dialogs (see below).
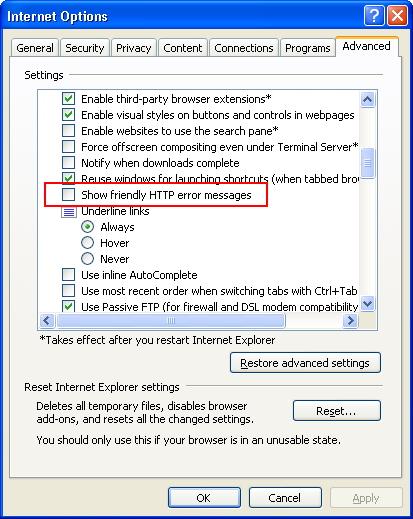
An existing Virtual directory can be marked as an IIS application by right clicking on it and selecting "Convert to Application". You may encounter the following error messages when you run PHP pages with IIS 7: "An error occurred on the server when processing the URL. Please contact the system administrator" Go to Internet Options->Advanced, disable "Show friendly HTTP error messages".
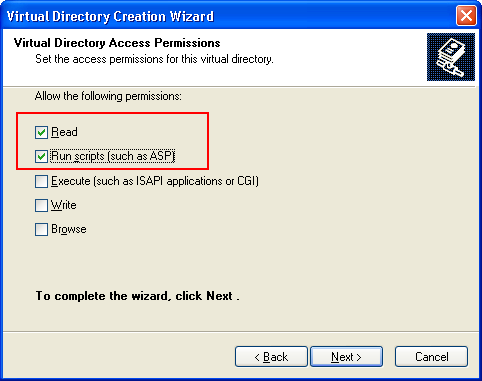
Configuring Permissions An important aspect of working with files on the Web server is to correctly configure permissions, especially when the web application needs to write file on the server.. When a Web application uses a file, the application must have Read permission to the file so the application can access the data. Additionally, the application must have Write permission to the folder that contains the file. Write permission is required because the file may be created at run time. If you use Linux/Unix, CHMOD your upload folder to "777" by using your FTP software. If you use IIS, the anonymous IIS user is IUSR_<MachineName> by default. Therefore, to read/write a file in an PHP Web application, you must configure the folder that contains the file to have both Read and Write permissions for the IUSR_<MachineName> user account. To set permissions in the folder (if you're using NTFS on Windows 2000 or later),
Running on 64-bit Windows Operating System Windows Server 2008 64-bit (IIS 7) On 64-bit Windows 2008, IIS 7 can run both 32-bit and 64-bit worker processes simultaneously. To run 32-bit Web applications in IIS 7 on 64-bit Windows 2008 all it needs is to assign the 32-bit applications to a separate application pool in IIS and turn on the Enable 32-Bit Applications switch for that application pool. To do this, open IIS Manager, open Application Pool, select the application pool, and then click Advanced Settings. In Enable 32-Bit Applications, select True. Windows Server 2003 64-bit (IIS 6) On 64-bit Windows 2003, although IIS 6 supports running both 64-bit and 32-bit worker processes, it doesn't support running in both modes simultaneously. By default IIS 6 is configured to run in native 64-bit mode and work only with 64-bit worker processes, which means you can only run 64-bit Web applications (for ASP.NET applications they can only target ASP.NET version 2.0 or higher) in the native mode. In order to run 32-bit Web applications you will need to set IIS 6 to run in 32-bit mode. Note: This means all your Web applications will now run in 32-bit mode. To enable IIS 6 to run 32-bit worker processes follow these steps:
The following article explains the details of the changes in the behavior of IIS after configuring it to run 32-bit worker processes: Running 32-bit Applications on 64-bit Windows (IIS 6.0)
|
| ©2007-2011 e.World Technology Ltd. All rights reserved. |