Table Setup
Note: For simplicity, we use "table" through this help file to refer to any of database object in the project. A database object can be either a table, a view, a custom view or a report.
After loading the database, the tables and views will be shown in the database pane on the left pane (database pane). Click on the [Tables] or [Views] or [Custom Views] or [Reports] node to go to the Table Setup page at any time.
The Table Setup pages consists of two section. The upper section is a grid showing available options of all tables. The lower section contain two panels, the [Table-specific Options] panel and the [Report Settings] panel for the selected table.

Note: For all checkbox or combobox columns, if you want to apply the setting to ALL tables or views, you can choose your setting at the [Tables] or [Views] or [Custom Views] or [Reports] row.
The available table level settings are as follows:
Generate
Select/unselect a particular table for generation
Caption
To change the caption of a table, click on [Caption] box to make the necessary change.
Filter (WHERE Clause)
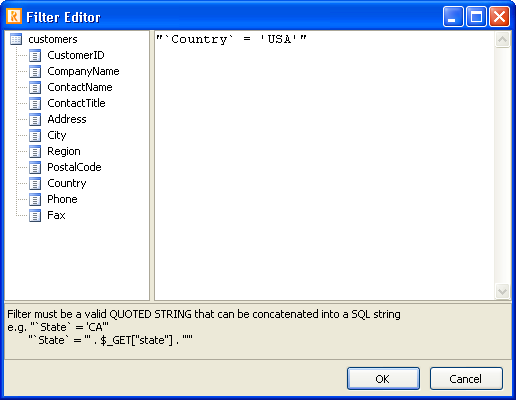
Specify a filter (WHERE clause) for the table. Click the [...] button in [Filter] column, the Filter Editor will popup. Enter your filter, you can drag the field names from the left pane to the editor, the SQL identifier quote characters will also be added for you automatically.

Note: The filter must be a valid VBScript string as the WHERE clause will be concatenated to the SQL string. For example, "State = 'CA'".
Sort (ORDER BY clause)
Specify the sort fields (ORDER BY clause) for the table. Click the [...] button in [Sort] column, the following dialog box will popup. You can choose up to 6 fields, in either ascending or descending order.

Default
Set a Table as the Default Table. The Default table is the first table the user see when visiting your site. Select the table you want in the [Default] column.
Requires Search Criteria
Specifies if the report requires search criteria (filtering). Default is disabled.
Note: If enabled, the report always requires search criteria. When the page is initially loaded, no records will be displayed until searching is done. (Remember to enable Filter or Extended Filter or both)
Table-specific Options
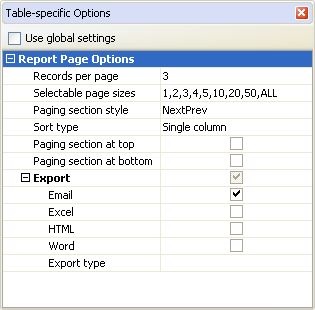
Same as the list page options as described in ASP Setup except that the options are table-specific, meaning you can have different list page options for different tables. To use table-specific options, select a table in the grid, uncheck [Use global settings] in the [Table-specific Options] panel, the panel will be enabled for you to setup.

Report Settings
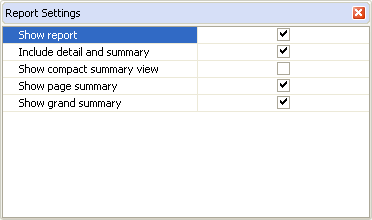
| Show Report |
Show/Hide the report. If you want to show charts only, uncheck this setting. |
| Show Empty Rows |
Show the data row even if it is empty
Note: For use with Crosstab reports only.
|
| Include Row Sums |
Includes row sums for the crosstab report
Note: For use with Crosstab reports only
|
| Include Detail and Summary |
If checked, records belonged to each grouping level will be displayed under the grouping level title, then followed by the summary. If unchecked, only the summary will be displayed.
Note: NOT applicable to Crosstab reports.
|
| Show Compact Summary View |
If checked, the summary will be displayed as columns for each group. If unchecked, the summary are displayed at the bottom of each group (as in previous versions).
Notes:
- Only applicable when Include Detail and Summary is unchecked (i.e. show summary only)
- NOT applicable to Crosstab reports.
|
| Show Page Summary |
If checked, the summary for the records in the current page will be displayed at the end of the page. |
| Show Grand Summary |
If checked, the summary for all the records in the report will be displayed at the end of the page. |

|

